Monstera Deliciosa, also known as the Swiss cheese plant, is a popular and visually striking houseplant. If you’re looking to expand your plant collection or share the joy of growing this fascinating houseplant with friends, learning how to propagate Monstera Deliciosa is a fantastic option.
In this step-by-step guide, I’ll walk you through the process of propagating Monstera Deliciosa, from selecting the right cuttings to caring for new plants.
Whether you’re a seasoned plant parent or just starting out, this guide will help you successfully propagate your Monstera Deliciosa and expand your indoor jungle.
Let’s go!
What is Monstera Deliciosa?
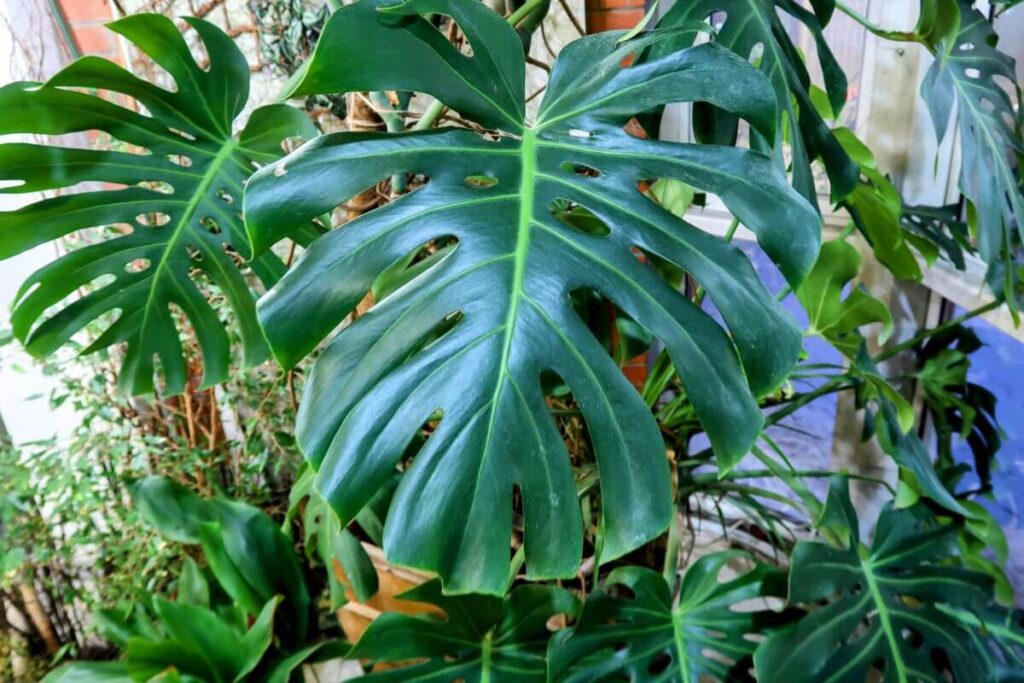
Monstera Deliciosa is a tropical plant known for its striking foliage and unique aerial roots, making it a popular choice for interior decor. With its iconic split leaves resembling Swiss cheese, it has gained the nickname “Swiss Cheese Plant.”
This stunning plant originates from the rainforests of Central and South America, where it climbs trees using its aerial roots.
Its scientific name, Monstera Deliciosa, translates to “delicious monster,” derived from the tasty fruit it bears in the wild. The glossy, heart-shaped leaves develop distinct perforations as the plant matures, adding to its allure.
Why Propagate Monstera Deliciosa?
Propagating Monstera Deliciosa allows you to reproduce new plants from cuttings, enabling you to expand your collection or share this stunning plant with others.
Additionally, propagation can help rejuvenate an aging or leggy plant, promoting bushier growth and enhancing its overall appearance. This plant grows relatively quickly under ideal conditions, so you may want to prune your plant every now and then. Healthy cuttings make great baby Monstera plants!
Propagation Methods: 3 Ways to Propagate Monstera Deliciosa
When it comes to propagating your Monstera Deliciosa, there are a few common methods to choose from. Each method has its own advantages and can be chosen based on your personal preference and the resources you have available.
Here are 3 ways to propagate your Monstera plant:
1: Water Propagation
Water propagation is a popular method for propagating Monstera Deliciosa. This method is my favorite, since it’s the most surefire way to propagate the plant.
To start, you will select a healthy stem with a few leaves and submerge the cut end in a container of water.
Then, place the container in a well-lit area, but out of direct sunlight, and change the water every few days to prevent stagnation.
Over time, you’ll notice roots beginning to develop. Once the roots are a few inches long, you can transfer the cutting to soil.
2: Soil Propagation
Soil propagation is another effective method for propagating Monstera Deliciosa. Simply take a healthy stem cutting and gently insert it into a small pot filled with moist potting soil.
Keep the soil consistently moist and place the pot in a warm, well-lit area. With time, you’ll observe new growth and roots forming.
Soil propagation is more risky than water propagation, since the stem can easily start rotting if the soil is too moist. Hence, make sure that the soil is well-draining to avoid waterlogging the cutting.
3: Air Layering
Air layering is a more advanced propagation method but can yield excellent results.
For this propagation method, you will select a mature stem and make a small incision to expose the inner tissue. Then, apply rooting hormone to the exposed area and wrap it in moist sphagnum moss.
After a few weeks, roots will start to form within the moss. Once the roots are well-established, you can cut the stem below the rooted area and plant it in its own pot.
Preparing for Propagation
Alright, are you ready to propagate your Monstera plant? Here’s what you should do:
Step 1: Select the Right Stem
First, choose a healthy stem for propagation. If you see any brown or yellow leaves, prune the plant but don’t use those cuttings for propagation.
Thus, look for a healthy stem with at least one node, which is where the roots will grow. Nodes are the small brownish bumps on the stem; they are essential for producing roots and new growth.
Select a stem that is long enough to have a few nodes but not too long, as it may hinder the propagation process.
Step 2: Use the Right Tools and Materials
Gather the essential tools and materials before you begin the propagation process.
You will need a sharp, clean pair of pruning shears to cut the stem, ensuring a clean cut that will promote healthy growth.
Additionally, prepare a clean container filled with water or well-draining soil for the propagated stem to root in.
Lastly, if you want to speed up the development of strong and healthy roots, have some rooting hormone on hand.
Method 1: Water Propagation for Monstera Deliciosa: Step-by-Step Guide
Water propagation is the easiest method for propagating your Monstera. Here’s how you should do it:
Step 1: Clean and Sterilize Your Pruning Shears
When it comes to propagating houseplants, clean tools are absolutely essential. You don’t want to spread any diseases or pests from one houseplant to another. I sterilize my pruning shears with alcohol before using them, and even between individual cuttings.
Step 2: Select a Healthy Stem Cutting
When choosing a stem cutting for water propagation, select a healthy stem with at least one leaf and a node. The node is where the roots will emerge, so a cutting with multiple nodes can increase the chances of successful propagation.
And again, remember to make sure that the cutting is free from any signs of disease or damage, as it could hinder the propagation process.
Step 3: Place the Cutting in Water
Next, it’s time to place your Monstera cutting in water. Use a clean container filled with room temperature water. Submerge the node of the cutting in the water, ensuring that at least one leaf is above the waterline.
It’s crucial to place the cutting in an area with bright, indirect light and maintain a consistent water level throughout the process.
Step 4: Monitor Your Cutting
Throughout the propagation process, you want to monitor the cutting regularly to see how things are going. Check the water level to ensure that the node remains submerged. Monitor the cutting for any signs of rot or discoloration. Change the water at least weekly to prevent the build-up of bacteria. Patience is key during this stage, as root development can take several weeks to occur.
By following these steps, you can successfully propagate a Monstera deliciosa using the water propagation method.
Method 2: Soil Propagation for Monstera Deliciosa: Step-by-Step Guide
Planting a cutting directly into a pot is another way to propagate Monstera Deliciosa. Here’s how to do soil propagation for your Monstera:
Step 1: Prepare the Pot and Soil
For soil propagation, start by selecting a pot that is approximately 6 inches in diameter with drainage holes at the bottom. This allows excess water to escape, preventing the roots from rotting.
Next, prepare a mixture of potting soil and perlite in a 2:1 ratio to ensure proper drainage and aeration. The soil should be slightly moist but not waterlogged.
Step 2: Water the Soil
Your Monstera cutting will need moisture in the soil to build healthy roots. However, make sure you don’t make the soil too moist to prevent rotting.
Step 3: Plant the Stem Cutting
Now pick a healthy stem cutting with at least one node and leaf. Using a clean, sharp blade or cutting shears, make a diagonal cut just below a node.
After that, gently place the cutting into the soil, ensuring that the node and aerial root are covered, and lightly press the soil around it to secure the cutting in place.
It’s essential to keep the soil slightly moist and maintain high humidity by covering the pot with a plastic bag or dome.
Step 4: Care for the New Monstera Plant
Place the pot in a warm, bright location away from direct sunlight to avoid scorching the cutting. Regularly mist the cutting and check the soil moisture to ensure it remains slightly damp.
After a few weeks, you will start to see new growth, indicating that the propagation was successful.
Once the roots are well established, you can gradually acclimate the new plant to its final growing spot in your home.
Method 3: Air Layering Propagation for Monstera Deliciosa: Step-by-Step Guide
Air layering to propagate Monstera Deliciosa is a somewhat more advanced method for creating new Monstera plants. Here’s how to do it:
Step 1: Identify the Right Stem for Air Layering
Start by choosing a healthy, mature stem with visible nodes, as this is where the roots will sprout from.
Look for a section with plump, firm tissue, which indicates a higher likelihood of successful root formation.
It’s essential to select a stem that is not too woody or too green, as the ideal stem is semi-hardwood with the potential for root development.
Step 2: Prepare the Stem for Air Layering
Once you have found the right stem, carefully remove a narrow strip of bark from the chosen section. You can do this by making a horizontal cut around the stem, followed by a vertical cut to connect the ends.
After gently peeling the bark away, make sure that the exposed area is free from debris and pests. This preparation is crucial for the successful formation of roots, as it encourages the development of new tissue and promotes the initiation of the rooting process.
Step 3: Encourage Root Growth
After the stem is prepared, apply a rooting hormone to the exposed area to stimulate root growth.
Then wrap the section with moist sphagnum moss or peat moss, which helps to maintain the necessary moisture levels for root development. To keep the moss in place, secure it with plastic wrap or aluminum foil, creating a conducive environment for the roots to emerge.
Monitor the progress regularly, keeping the moss consistently moist and ensuring that the roots are forming as intended.
This method of air layering provides the stem with the support it needs to develop a healthy root system, leading to a successful propagation of the Monstera Deliciosa plant.
Planting Your New Monstera Plant
Once your new Monstera baby plant has developed a healthy root system, it’s time to plant it in soil. Spring and summer are ideal for planting and transplanting a Monstera.
Of course, with soil propagation, your new plant will already be planted in soil. Hence, you can simply leave your Monstera in the same pot and follow my Monstera care guide to help it thrive. Once potted, your Monstera can say in the same pot until you can see roots growing out of the pot’s drainage holes. When those roots are visible and robust, the plant has likely outgrown its pot.
With water propagation and air layering, keep an eye on how the new roots are developing. At first, they will be very fine and brittle, so you need to be careful with them. Once the roots are robust and sturdy, it’s time to plant your cutting.
Here’s how to plant a propagated Monstera cutting:
- Select a Suitable Pot: Choose a big enough pot for the plant, allowing ample space for root expansion.
- Prepare the New Pot: Place a layer of well-draining soil at the bottom, ensuring proper aeration.
- Inspect the Roots: Carefully loosen any tightly bound roots on your baby plant to encourage outward growth.
- Transfer the Plant: Position the plant in the center of the new pot and fill the remaining space with fresh, well-draining soil.
- Water and Settle: After transplanting, water the plant thoroughly to help the soil settle and eliminate air pockets.
Transplanting your Monstera Deliciosa at the right time and with the proper technique will promote continued growth, ensuring a robust and flourishing plant.
Conclusion
In conclusion, learning how to propagate Monstera Deliciosa is easier than you may think. The entire propagation journey is a rewarding and enjoyable process, and you’ll soon have an entire family of Monstera plants in your home.
By following the step-by-step guide outlined in this post, you can successfully multiply your Monstera collection and share the beauty of this popular houseplant with friends and family.
Remember to exercise patience and diligence throughout the propagation process, and soon enough, you’ll have thriving new Monstera plants to adorn your living space. Happy propagating!
Keep reading: